Safety Guidelines
Always wear safety glasses when operating the compressor. Ensure the area is well-ventilated and free from flammable materials. Never operate near open flames or sparks. Keep loose clothing and long hair tied back. Children should be kept at a safe distance. Regularly inspect hoses and connections for damage. Turn off the compressor and bleed pressure before maintenance. Follow all instructions carefully to avoid accidents.
1.1 Pre-Operation Checks
Before starting the Craftsman air compressor model 919, perform a thorough pre-operation inspection. Inspect all hoses and connections for signs of damage, wear, or leaks. Ensure the air tank is clean and free from moisture. Check the oil level (if applicable) and top it off as needed. Verify that the pressure gauge is functioning correctly and set the maximum pressure according to the manufacturer’s recommendations. Make sure the ventilation in the area is adequate to prevent the accumulation of compressed air or fumes. Test the emergency shutdown feature to ensure it works properly. Always ensure the compressor is placed on a level surface and the surrounding area is clear of obstacles. Finally, drain the air tank regularly to prevent water buildup. Follow these steps to ensure safe and efficient operation.
1.2 Handling and Storage Safety
Proper handling and storage of the Craftsman air compressor model 919 are crucial for safety and longevity. When moving the compressor, always use the built-in handles and ensure the air tank is drained of pressure. Never lift the unit by the hoses or accessories. Store the compressor in a dry, well-ventilated area away from direct sunlight and flammable materials. Avoid storing it in extreme temperatures or humid environments. Keep the compressor out of reach of children and pets. If the unit will be stored for an extended period, disconnect the power cord and drain the air tank completely. Regularly inspect the storage area for any signs of damage or leaks. Always follow the manufacturer’s guidelines for transportation and storage to ensure safe handling and maintain the compressor’s performance. Proper storage will help prevent damage and ensure reliable operation when needed.
1.3 Emergency Procedures
In case of an emergency, immediately turn off the compressor and disconnect the power source. If a malfunction occurs, such as excessive noise or vibration, stop operation and bleed the air pressure from the tank and hoses. In the event of a leak or rupture, evacuate the area and ensure proper ventilation. Never attempt to repair the compressor while it is operational or under pressure. If a fire occurs, use a dry chemical fire extinguisher and avoid using water, as it may cause electrical hazards. Always prioritize personal safety and avoid risky interventions. After resolving the issue, inspect the compressor thoroughly before resuming use; For severe damage, consult a professional or contact the manufacturer. Regular maintenance can help prevent emergencies, but being prepared is essential for safe operation. Always follow the manufacturer’s guidelines for emergency situations.
Assembly Instructions
Begin by carefully unpacking and inspecting all components. Mount the compressor unit securely to the tank, ensuring proper alignment. Connect the air intake hose to the designated port and attach the pressure gauge. Follow the manual’s torque specifications for all bolt connections. Once assembled, double-check all fittings and connections for leaks. Refer to the manual for specific instructions on installing accessories like air regulators or safety valves. Proper assembly is crucial for safe and efficient operation. Always ensure the unit is placed on a level, stable surface before use.
2.1 Unpacking the Compressor
Carefully unpack the Craftsman Air Compressor Model 919 from its shipping box to avoid damaging any components. Inspect the unit for any visible damage or dents that may have occurred during transit. Ensure all accessories, such as the air hose, pressure gauge, and regulator, are included in the packaging. Refer to the parts list in the manual to confirm that no items are missing. Handle the compressor and tank with care, as they may be heavy and fragile. Place the unit on a flat, stable surface to prevent tipping. Before proceeding with assembly, thoroughly review the unpacking checklist in the manual to ensure all components are accounted for. This step is crucial to guarantee safe and proper assembly of the compressor. Always follow the manufacturer’s instructions for unpacking to avoid potential hazards.
2.2 Initial Setup and Preparation
After unpacking, position the Craftsman Air Compressor Model 919 on a level, stable surface to ensure proper operation. Ensure the area is clear of debris and well-ventilated to prevent overheating. Locate the compressor away from direct sunlight and moisture to maintain optimal performance. Attach the feet or base provided to minimize vibration during operation. Connect the power cord to a suitable electrical outlet, ensuring it matches the voltage requirements specified in the manual. Check the tank drain valve to ensure it is closed before turning on the compressor. Open the air intake valve to allow the compressor to draw in air efficiently. Review the control panel to familiarize yourself with the pressure gauge, regulator, and on/off switch. This setup ensures the compressor is ready for safe and efficient operation. Always follow the manufacturer’s guidelines for initial setup to prevent potential issues.
2.3 Attaching Accessories
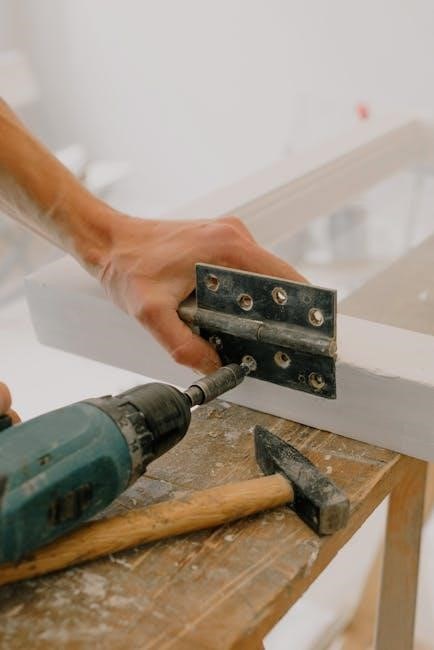
Before attaching any accessories to your Craftsman Air Compressor Model 919, ensure the compressor is turned off and all pressure is released. Attach the air hose to the designated port on the compressor, securing it tightly with the provided fittings. For tools or accessories requiring specific connectors, use the quick-connect couplers to ensure a leak-free seal. If using a pressure regulator, mount it according to the manual and connect it to the compressor’s output port. Ensure all connections are tightened properly to avoid air leaks. For attachments like airbrushes or impact wrenches, refer to their manufacturer’s instructions for compatibility and connection guidelines. Always test the system at low pressure to check for leaks before full operation. Properly securing all accessories ensures safe and efficient performance of the compressor. Follow the manual’s recommendations for compatible accessories to maximize functionality.
Operation Overview
Start the Craftsman 919 by turning the switch and allowing it to build pressure. Adjust the regulator for desired pressure settings. Use approved air tools and follow all operational guidelines for safe and efficient performance.
3.1 Starting the Compressor
To start the Craftsman 919 air compressor, ensure the tank is drained and all safety precautions are followed. Locate the power switch and turn it to the “ON” position. Allow the compressor to build pressure gradually until it reaches the maximum pressure setting. Monitor the pressure gauge to ensure it operates within the recommended range. If the compressor is equipped with an automatic start/stop feature, it will begin cycling based on the set pressure limits. Always ensure the safety valve is functioning properly before starting. If the compressor does not start, check the power supply and ensure all connections are secure. Refer to the manual for specific starting procedures and troubleshooting tips. Proper startup ensures efficient and safe operation.
3.2 Adjusting Pressure Settings
To adjust the pressure settings on your Craftsman 919 air compressor, locate the pressure regulator knob on the control panel. Turn the knob clockwise to increase the pressure or counterclockwise to decrease it. Always refer to the pressure gauge to monitor the current setting. Ensure the pressure does not exceed the maximum recommended level specified in the manual. Adjustments should be made while the compressor is turned off and the tank is depressurized. This ensures safe and accurate modifications to the pressure output. Properly set pressure levels optimize performance for various tools and tasks. Always follow the manufacturer’s guidelines for pressure adjustments to maintain efficiency and safety.
3.3 Using Air Tools and Accessories
To adjust the pressure settings on your Craftsman 919 air compressor, locate the pressure regulator knob on the control panel. Turn the knob clockwise to increase the pressure or counterclockwise to decrease it; Always refer to the pressure gauge to monitor the current setting. Ensure the pressure does not exceed the maximum recommended level specified in the manual. Adjustments should be made while the compressor is turned off and the tank is depressurized. This ensures safe and accurate modifications to the pressure output. Properly set pressure levels optimize performance for various tools and tasks. Always follow the manufacturer’s guidelines for pressure adjustments to maintain efficiency and safety.

Maintenance Schedule
Regularly inspect the compressor for wear and tear. Ensure proper lubrication of moving parts. Clean the air filter and check for blockages. Drain moisture from the tank daily.
4.1 Routine Maintenance Checks
Regularly inspect the air filter and clean or replace it as needed to ensure optimal airflow. Check the compressor oil level and top it off with the recommended lubricant. Inspect hoses and connections for signs of wear, cracks, or leaks. Ensure all bolts and fittings are tightened securely. Drain the water from the tank daily to prevent rust and corrosion. Monitor the pressure gauge for accurate readings and calibrate if necessary. Always turn off the compressor and bleed the system before performing any checks. Refer to the warranty information for specific maintenance recommendations to avoid voiding the warranty. Regular maintenance ensures efficient operation and extends the lifespan of your Craftsman air compressor.
4.2 Lubrication Requirements
The Craftsman air compressor 919 requires regular lubrication to ensure smooth operation and longevity. Use a high-quality SAE 30 non-detergent oil or equivalent, as specified in the manual. Check the oil level before each use and top it off if necessary. The compressor is permanently lubricated, so frequent oil changes are not required. However, inspect the oil for contamination or depletion every 50 hours of operation. If the oil appears dirty or low, drain and replace it with the recommended type. Never use synthetic or diesel oil, as it may damage the compressor. Always refer to the warranty information for lubrication guidelines to avoid voiding the warranty. Proper lubrication ensures efficient performance and prevents overheating. Regular maintenance is essential to keep your compressor running effectively. Follow the lubrication schedule to extend the lifespan of your Craftsman air compressor.
4.3 Cleaning the Compressor
Regular cleaning is essential to maintain the efficiency and longevity of your Craftsman air compressor 919. Always turn off the compressor and bleed any remaining pressure in the tank before cleaning. Use a soft-bristle brush or a clean cloth to remove dirt, dust, or debris from the exterior surfaces. Pay special attention to the air intake filter, as a clogged filter can reduce performance. Clean or replace the filter according to the manufacturer’s instructions. For tougher stains or grease, use a mild detergent and water, but avoid harsh chemicals that could damage the finish. Never use abrasive materials or high-pressure washes, as they may harm the compressor’s components. After cleaning, ensure all surfaces are dry to prevent rust. Regular cleaning prevents corrosion and ensures optimal airflow and performance. Follow the maintenance schedule outlined in the manual for best results;
Troubleshooting Common Issues
Identify common problems like low air pressure, excessive noise, or motor overload. Check for air leaks in hoses or connections. Ensure the air filter is clean and unclogged. If the compressor overheats, verify proper ventilation. For pressure drops, inspect the tank for damage or rust. If the motor stops suddenly, check the breaker or fuses. Lubricate moving parts if they appear dry. Refer to the diagnostic steps in the manual for detailed solutions. Regular maintenance can prevent many issues. Always follow safety guidelines when troubleshooting.
5.1 Identifying Common Problems
Common issues with the Craftsman Air Compressor 919 include low air pressure, excessive noise, and motor overload. Low air pressure may result from air leaks in hoses or faulty pressure regulators. Excessive noise could indicate loose belts or worn piston rings. Motor overload often occurs due to overuse or high ambient temperatures. Other issues include pressure drops, which might be caused by a damaged tank or clogged air filters. If the compressor fails to start, check the power supply and breaker. For continuous running, ensure the tank is not overfilled and the pressure switch is functioning correctly. Always refer to the troubleshooting guide in the manual for detailed diagnostics and solutions. Regular maintenance can help prevent many of these issues.
5.2 Diagnostic Steps
To diagnose issues with your Craftsman Air Compressor 919, start by checking the power supply and ensuring the circuit breaker is not tripped. Next, inspect the air filter for blockages and clean or replace it if necessary. Check for air leaks in hoses and connections by applying a soapy water solution. If the compressor does not start, verify the pressure switch is functioning correctly. For low pressure output, examine the regulator and ensure it is set properly. Excessive noise may indicate loose belts or worn piston rings, so tighten or replace them as needed. Monitor the tank pressure and ensure the drain valve is functioning to prevent moisture buildup. If issues persist, consult the troubleshooting guide in the manual for detailed steps. Always turn off the compressor and bleed pressure before performing diagnostics.
5.3 Resetting the Compressor
To reset your Craftsman Air Compressor 919, start by turning off the power supply and ensuring the unit is completely cooled down. Locate the pressure switch, typically found near the tank, and check if it has tripped. If it has, gently press the reset button to restore functionality. Next, bleed any remaining pressure from the tank by opening the drain valve located at the bottom of the tank. This ensures no residual air remains. If the circuit breaker has tripped, reset it either on the compressor or in your home’s electrical panel. Finally, turn the compressor back on and allow it to build pressure normally. Always wear safety glasses and ensure the area is clear of obstacles before restarting. If issues persist, consult the troubleshooting guide for further assistance.

Repair and Replacement Parts
For the Craftsman Air Compressor 919, genuine replacement parts can be ordered through Sears Parts Direct. This includes components like the pressure switch, air filter, and belt. Always refer to the parts list in your manual for accurate identification.
6.1 Overview of Repair Parts
The Craftsman Air Compressor 919 requires genuine parts for optimal performance. Common repair parts include the pressure switch, air filter, belt, and check valve. These components ensure efficient operation and longevity. The pressure switch controls the compressor’s start and stop functions, while the air filter prevents dust and debris from entering the system. Replacing worn or damaged parts promptly prevents further damage. Always consult the parts list in your manual to identify the correct components. For convenience, Sears Parts Direct offers a comprehensive selection of replacement parts, ensuring quick access to what you need. Proper installation of these parts is essential to maintain safety and functionality. Using non-genuine parts may void the warranty and compromise performance. Regularly reviewing and replacing worn parts is crucial for maintaining your compressor’s efficiency and reliability.
6.2 Ordering Replacement Parts
To order replacement parts for your Craftsman Air Compressor 919, visit Sears Parts Direct or contact the nearest Sears Service Center. Ensure you have your compressor’s model number (e.g., 919.167342) handy for accurate part identification. Use the online part diagrams to locate and verify the correct components. Replace only with genuine Craftsman parts to maintain performance and warranty validity. For convenience, parts can be shipped directly to your home or made available for pickup. Always double-check the part number before placing your order. If unsure, refer to the parts manual or contact customer support. Promptly replacing worn or damaged parts ensures optimal functionality and safety. Sears Parts Direct offers a user-friendly platform to search, select, and purchase the necessary components efficiently.

Warranty Information
The Craftsman Air Compressor 919 is covered by a one-year limited warranty from the date of purchase. This warranty covers defects in material and workmanship. For commercial use, the warranty period is reduced to 90 days. To file a claim, contact the nearest Sears Service Center or return the compressor to the place of purchase with proof of purchase. Warranty repairs are free of charge, and Sears reserves the right to repair or replace the unit at its discretion.

7.1 Warranty Coverage Details
The Craftsman Air Compressor 919 is protected by a one-year limited warranty starting from the purchase date. This warranty addresses defects in materials and workmanship. For commercial or rental use, the coverage is reduced to 90 days. The warranty does not cover damage resulting from misuse, neglect, or unauthorized modifications. To make a claim, contact the nearest Sears Service Center or return the compressor to the purchase location with a valid receipt. Sears may choose to repair or replace the unit free of charge. This warranty ensures peace of mind and protection for your investment in the Craftsman Air Compressor.
7;2 Filing a Warranty Claim
To file a warranty claim for your Craftsman Air Compressor 919, contact the nearest Sears Service Center at 1-800-4-MY-HOME. Provide proof of purchase and a detailed description of the issue. You may also return the compressor to the place of purchase for evaluation and potential replacement. Ensure the unit is in its original condition with all accessories included. The warranty does not cover damages caused by misuse, neglect, or unauthorized modifications. Claims must be made within the warranty period, which is one year for residential use and 90 days for commercial or rental use. Sears will assess the issue and repair or replace the compressor at no cost if the claim is valid. Keep your receipt and model number handy for a smoother process.