Canon EOS Digital Rebel XT (350D) Manual: A Comprehensive Guide
This manual details the Canon EOS Digital Rebel XT/350D, a high-performance digital SLR, offering versatile shooting with an 8-megapixel CMOS sensor and EF lens compatibility.
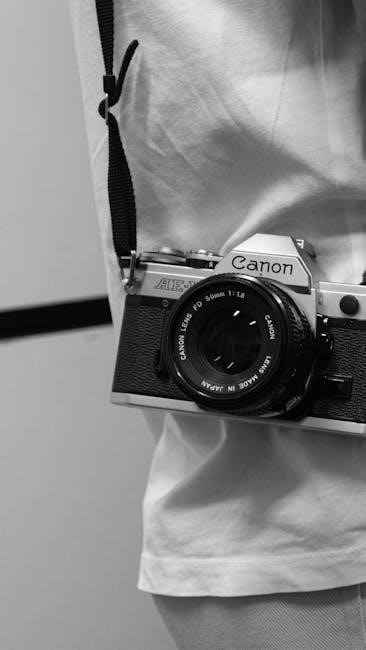
The Canon EOS Digital Rebel XT (also known as the EOS 350D) represents a significant step into the world of Digital Single-Lens Reflex (DSLR) photography. Released to considerable acclaim, this camera quickly became popular among both novice and experienced photographers seeking a balance between performance, features, and affordability.
Boasting an 8.0-megapixel CMOS sensor, the XT delivers impressive image quality and detail. Its compatibility with the extensive range of Canon EF and EF-S lenses provides users with considerable creative flexibility. This manual serves as a comprehensive resource, guiding you through every aspect of the camera, from initial setup and basic operation to advanced features and troubleshooting. Whether you’re a beginner or looking to maximize your photographic potential, this guide will unlock the full capabilities of your Canon Rebel XT.
Key Features and Specifications
The Canon EOS Digital Rebel XT/350D distinguishes itself through several key features. Its 8.0-megapixel CMOS sensor captures detailed images, while compatibility with Canon EF and EF-S lenses expands creative possibilities. The camera boasts a fast and responsive autofocus system, crucial for capturing sharp action shots.
Specifications include a DIGIC I image processor, ensuring efficient image processing and vibrant colors. It offers a 3.0-inch LCD screen for image review and menu navigation. The XT supports both RAW and JPEG image formats, providing flexibility in post-processing. Its compact and lightweight body enhances portability. Further specifications encompass a shutter speed range of 30-1/2000 seconds and ISO settings from 100-1600, catering to diverse shooting conditions.
Unboxing and Initial Setup
Upon unboxing your Canon EOS Digital Rebel XT/350D, you’ll find the camera body, a kit lens (typically 18-55mm), a battery, a battery charger, a shoulder strap, and various manuals and software CDs. Begin by carefully removing all packaging materials.
Insert the battery into the battery compartment and connect the charger to a power outlet. Fully charge the battery before initial use. Once charged, power on the camera. The initial setup will prompt you to set the date, time, and language. Follow the on-screen instructions to configure these settings. Finally, insert a compatible memory card (CompactFlash) to store your photos. Ensure the card is properly seated before proceeding with shooting.

Understanding the Camera Body
The Canon EOS Digital Rebel XT features a compact, lightweight body designed for comfortable handling, offering access to essential controls for intuitive operation.
Front Panel Overview
The front panel of the Canon EOS Digital Rebel XT houses key components for lens attachment and operation. Centrally located is the Canon EF lens mount, compatible with a wide range of EF and EF-S lenses, enabling diverse photographic possibilities. To the right of the lens mount, you’ll find the lens release button, crucial for quickly changing lenses.
Below the lens mount resides the autofocus (AF) assist beam emitter, aiding low-light focusing. The self-timer/drive mode dial allows selection between single shooting, continuous shooting, self-timer, and mirror lockup. Finally, the depth-of-field preview button provides a visual representation of the image’s depth of field at the selected aperture, assisting in precise focusing and creative control. Understanding these elements is fundamental to utilizing the camera’s full potential.
Rear Panel Controls and Functions
The rear panel of the Canon EOS Digital Rebel XT is densely populated with controls for image review and camera settings. The prominent 1.8-inch LCD screen serves as the primary display for composing shots, reviewing images, and navigating menus. To the right of the LCD, a four-way controller with a central SET button facilitates menu navigation and setting adjustments.
Additional buttons include the ‘Print/Share’ button for direct printing and image transfer, the ‘Menu’ button for accessing the camera’s comprehensive settings, and the ‘Digital Zoom’ button. The ‘Playback’ button initiates image review, while the ‘Delete’ button removes unwanted photos. The ‘AF Point Selection/Drive’ button allows for customizing autofocus points and drive modes. Mastering these controls unlocks the camera’s full functionality.
Top Panel Buttons and Dials
The Canon EOS Digital Rebel XT’s top panel houses essential controls for shooting mode selection and camera operation. A prominent mode dial allows quick access to Auto, Program (P), Aperture Priority (Av), Shutter Priority (Tv), Manual (M), and Scene modes. Adjacent to the mode dial is the main power switch, integrating the shutter button for immediate image capture.
Further along, the metering mode button enables selection between evaluative, partial, and center-weighted average metering. A dedicated ISO button provides direct access to ISO sensitivity settings, crucial for controlling image noise in varying lighting conditions. The rear dial, conveniently positioned, adjusts settings like aperture, shutter speed, and exposure compensation, offering tactile control during shooting.
Basic Operation
Canon EOS Digital Rebel XT operation begins with proper power management, date/time setting, and menu navigation for optimal camera functionality and personalized settings.
Powering On/Off and Battery Management
To power on your Canon EOS Digital Rebel XT, locate the power switch on the top panel and slide it to the “ON” position. The camera will initialize, and the LCD screen will illuminate. To power off, return the switch to the “OFF” position.
Battery management is crucial for extended shooting sessions. The XT utilizes a battery pack; monitor the battery level indicator on the rear panel. A low battery warning will appear when power is dwindling. It’s recommended to have a fully charged spare battery readily available, especially during travel or lengthy shoots.
Avoid completely draining the battery, as this can potentially shorten its lifespan. Use the Canon-supplied battery charger to recharge the battery pack when it’s low or depleted. Always ensure the charger is connected to a stable power source.
Setting the Date and Time
Accurate date and time settings are essential for proper image organization and metadata. To set the date and time on your Canon EOS Digital Rebel XT, navigate to the menu system. Access the “Setup” menu, typically represented by a wrench icon. Within the Setup menu, locate the “Date/Time” option.
Use the directional buttons to adjust the year, month, day, hour, and minute. Confirm each selection by pressing the “SET” button. Ensure you select the correct date and time format (12 or 24-hour).
Incorrect date/time settings can cause issues with image sorting and chronological order. Regularly verify the accuracy of the date and time, especially after replacing the battery or if the camera has been stored for an extended period.
Navigating the Menu System
The Canon EOS Digital Rebel XT’s menu system is accessed by pressing the “MENU” button on the rear panel. The menu is divided into several tabs, each representing a different category of settings – such as shooting, AF, quality, and setup. Use the directional buttons (up, down, left, right) to navigate through these tabs and options.
Highlight the desired menu item and press the “SET” button to enter its settings. Within each setting, use the directional buttons to adjust the values. Pressing “SET” again confirms your selection. To return to the previous menu level, press the “MENU” button once more.
Familiarize yourself with the menu structure to efficiently customize your camera settings. The menu system allows for extensive control over image quality, autofocus, and various camera functions.
Shooting Modes
The Canon EOS Rebel XT offers diverse shooting modes, including Auto, Program (P), Aperture Priority (Av), and Shutter Priority (Tv), catering to various skill levels.
Auto Mode for Beginners
Auto mode on the Canon EOS Digital Rebel XT is designed for photographers new to DSLR cameras, simplifying the shooting process. In this mode, the camera automatically selects the optimal settings for aperture, shutter speed, ISO, and white balance, based on the detected scene. This allows users to focus solely on composition and capturing the moment without needing to understand complex photographic principles.
Essentially, the camera does all the technical work, making it ideal for everyday snapshots, portraits, and landscapes. While offering convenience, Auto mode limits creative control; however, it’s a fantastic starting point for learning and building confidence before exploring more advanced shooting modes. The camera intelligently assesses lighting conditions and subject matter to deliver well-exposed images consistently.
Program Mode (P) for Creative Control
Program (P) mode on the Canon EOS Digital Rebel XT offers a balance between automatic operation and manual control, providing a stepping stone for photographers wanting more creative input. Unlike full Auto mode, Program mode allows you to adjust certain settings like ISO, white balance, and Picture Style, while the camera still automatically determines the appropriate aperture and shutter speed for proper exposure.
This mode is excellent for situations where you want to influence the look of your photos without fully committing to manual settings. You can also utilize exposure compensation to fine-tune the brightness of your images. Program mode provides a comfortable environment to experiment and learn how different settings affect the final result, fostering a deeper understanding of photographic principles.
Aperture Priority (Av) and Shutter Priority (Tv) Modes
Aperture Priority (Av) and Shutter Priority (Tv) modes on the Canon EOS Digital Rebel XT grant photographers significant control over specific exposure elements. In Av mode, you select the aperture (f-stop), influencing depth of field, while the camera automatically sets the shutter speed. This is ideal for portraits (shallow depth of field) or landscapes (large depth of field).
Conversely, Tv mode lets you choose the shutter speed, controlling motion blur or freezing action, with the camera adjusting the aperture accordingly. Use fast shutter speeds for sports and slow speeds for creative motion effects. These modes allow for artistic expression and precise control over how your images capture movement and focus, moving beyond fully automatic settings.
Focusing and Image Quality
The Canon XT features various autofocus modes and allows selection between RAW and JPEG image quality settings, alongside customizable white balance adjustments for optimal results.
Autofocus Modes and Selection
The Canon EOS Digital Rebel XT offers a selection of autofocus (AF) modes to suit various shooting scenarios. One-Shot AF is ideal for stationary subjects, locking focus when the shutter button is half-pressed. Continuous AF (AI Servo) tracks moving subjects, continuously adjusting focus as they move – perfect for sports or wildlife photography.
Manual Focus (MF) provides complete control over focusing, useful in low-light conditions or when precise focus is needed. The AF point selection allows you to choose which point the camera uses to achieve focus. You can select a single AF point, or utilize automatic AF point selection, letting the camera decide. Understanding these modes and how to select them is crucial for capturing sharp, well-focused images with your Canon XT.
Understanding Image Quality Settings (RAW vs. JPEG)
The Canon EOS Digital Rebel XT allows you to choose between shooting in RAW and JPEG formats. JPEG images are compressed, resulting in smaller file sizes, ready for immediate use and sharing. However, this compression discards some image data. RAW images, conversely, contain all the data captured by the sensor, offering maximum flexibility in post-processing.
Shooting in RAW allows for greater control over white balance, exposure, and other adjustments without sacrificing image quality. While RAW files are larger and require editing software, they are ideal for serious photographers seeking the highest possible quality and editing latitude. Consider your workflow and intended use when selecting your image quality setting.
White Balance Adjustment
Accurate white balance ensures colors are rendered naturally in your photos. The Canon EOS Digital Rebel XT offers several preset white balance modes, including Auto, Daylight, Cloudy, Shade, Tungsten, Fluorescent, and Flash. Auto white balance generally performs well in various conditions, but can sometimes be inaccurate.
For more precise control, use the custom white balance setting. This allows you to manually set the white balance by pointing the camera at a white or gray card under the current lighting conditions. Experiment with different settings to achieve the desired color temperature. Incorrect white balance can result in color casts, making images appear too warm (yellowish) or too cool (bluish).

Advanced Features
Canon’s Rebel XT boasts custom functions, effective flash utilization, and Picture Style settings for personalized image control and creative photographic expression.
Custom Functions and Personalization
The Canon EOS Digital Rebel XT (350D) empowers users with a range of custom functions, allowing for a tailored shooting experience. These functions enable photographers to personalize camera settings to match their individual preferences and shooting styles. You can reassign button operations, adjust menu display options, and fine-tune autofocus behavior.

Personalization extends to the camera’s control layout, optimizing workflow efficiency. Users can customize the Quick Control screen for rapid access to frequently used settings. This level of control is particularly beneficial for experienced photographers seeking to streamline their operations and respond quickly to changing shooting conditions. Explore the menu system to discover the full extent of customization options available, transforming the XT into a truly personal imaging tool.
Using Flash Effectively
The Canon EOS Digital Rebel XT offers versatile flash capabilities, enhancing image quality in challenging lighting conditions. The built-in flash provides a convenient solution for basic illumination, while the hot shoe allows attachment of external Speedlite flashes for greater control and power. Understanding flash modes – Auto, Manual, and Red-Eye Reduction – is crucial for optimal results.
For more advanced techniques, explore flash exposure compensation and synchronization modes. Utilizing E-TTL (Evaluative Through-The-Lens) flash metering with a compatible Speedlite enables automatic exposure calculation, simplifying complex lighting scenarios. Remember to consider bounce flash techniques to soften light and create more natural-looking portraits. Mastering flash usage unlocks creative possibilities and expands the XT’s photographic potential.
Picture Style Settings
Canon’s Picture Style settings on the EOS Digital Rebel XT allow photographers to customize the look of their images directly within the camera. These presets – Standard, Portrait, Landscape, Neutral, Faithful, and Monochrome – adjust sharpness, contrast, color saturation, and tone. Each style caters to different shooting scenarios and personal preferences.
Beyond the presets, users can create and save up to three custom Picture Styles, fine-tuning individual parameters to achieve a unique aesthetic. Experimenting with these settings is key to developing a personal visual style. Remember that Picture Styles affect JPEG images; RAW files retain all image data for post-processing flexibility. Understanding and utilizing Picture Styles empowers photographers to achieve desired results straight from the camera.

Troubleshooting Common Issues
Addressing error messages, image noise, and connectivity problems are crucial for a smooth shooting experience with your Canon EOS Digital Rebel XT camera.
Error Messages and Solutions
Encountering error messages on your Canon EOS Digital Rebel XT can be frustrating, but often easily resolved. A common message, “Err 90,” typically indicates a shutter curtain issue, potentially requiring professional service. “Card Full” necessitates either deleting images or inserting a new memory card. If you see “Invalid Picture Format,” ensure your card is formatted correctly within the camera’s menu.
For “Lens Error,” check the lens connection and ensure compatibility. Regularly cleaning the contacts on both the camera body and lens can prevent this. If the LCD displays “Battery Low,” replace or recharge the battery immediately. Refer to the full manual for a comprehensive list of error codes and their corresponding solutions, ensuring optimal camera performance and preventing potential damage.
Dealing with Image Noise
Image noise, appearing as graininess, can affect photos, especially in low light with the Canon EOS Digital Rebel XT. To minimize noise, keep your ISO setting as low as possible – ISO 100 or 200 are ideal for bright conditions. When higher ISOs are necessary, understand that noise will increase.
Utilize the camera’s noise reduction feature found within the menu settings; however, be aware that strong noise reduction can soften image details. Shooting in RAW format provides greater flexibility during post-processing, allowing for more effective noise reduction in software like Adobe Lightroom or Photoshop without significant detail loss. Proper exposure is also crucial, as underexposed images exhibit more noticeable noise.
Connectivity and Data Transfer
The Canon EOS Digital Rebel XT facilitates image transfer via USB 2.0 to your computer. Connect the camera using the provided cable, ensuring your computer recognizes it as a removable drive. You can then directly copy images and videos from the camera’s memory card.
Alternatively, the camera is compatible with PictBridge-enabled printers for direct printing without a computer. For video output, a standard definition video output port allows connection to a television. Remember to format your memory card within the camera for optimal compatibility and performance. Regularly updating your computer’s drivers can also ensure smooth data transfer and prevent connectivity issues.