Cuisinart Classic Waffle Maker Instructions: A Comprehensive Guide
Welcome! This guide unlocks your Cuisinart waffle maker’s potential, covering setup, operation, cleaning, and troubleshooting for delicious results every time.
Explore manuals and the WAF-100 Belgian Waffle Maker, ensuring optimal use and extending the life of your new kitchen appliance.
Understanding Your Cuisinart Waffle Maker
Familiarization is key! Your Cuisinart waffle maker is designed for simple, efficient operation, delivering perfectly cooked waffles with minimal effort. This appliance, often represented by models like the WAF-100, is a staple in many kitchens.
Understanding its core functionality begins with recognizing it’s more than just a breakfast tool. It’s a versatile device capable of creating various treats. The Internet Archive provides access to numerous Cuisinart user manuals, offering detailed insights into specific models.
These manuals, available for download, explain the waffle maker’s features, safety precautions, and optimal usage. Before first use, reviewing the manual specific to your model is highly recommended. This ensures safe and effective operation, maximizing your waffle-making experience.
Model Variations & Identification
Cuisinart offers a diverse range of waffle makers, each tailored to specific preferences and needs. Identifying your exact model is crucial for accessing the correct user manual and troubleshooting information. Common models include the WAF-100 Belgian Waffle Maker and various classic waffle iron designs.
Manualszz.com and the Internet Archive host a wealth of Cuisinart documentation, allowing you to pinpoint your model based on its features and appearance. Look for the model number typically located on the appliance’s base or within the user manual itself.
Variations exist in plate style (Belgian, traditional), browning control settings, and additional features. Knowing your model ensures you utilize the correct settings and maintenance procedures, maximizing performance and longevity.
Key Components & Parts Overview
Understanding the parts of your Cuisinart waffle maker is essential for safe and effective operation. Core components include the non-stick cooking plates – available in Belgian and traditional styles – which determine waffle texture. The housing encases the heating elements and provides structural integrity.
Essential controls typically involve a power switch and browning adjustment dial, allowing customization of cooking intensity. Indicator lights signal when the unit is heating and ready for batter. Some models feature a locking mechanism to secure the plates during cooking.
Familiarize yourself with these parts before first use, referencing your specific model’s manual for detailed diagrams and descriptions. Proper identification aids in cleaning, maintenance, and troubleshooting any potential issues.
Setting Up Your Waffle Maker
Prepare for waffle perfection! This section details initial cleaning, powering on the device, and seasoning the plates for optimal non-stick performance.
Follow these steps to ensure a delightful cooking experience.
Initial Cleaning & Preparation
Before your first waffle, thorough cleaning is essential. Carefully unpack your Cuisinart waffle maker and remove all packaging materials. Wipe down the exterior with a damp cloth – avoid abrasive cleaners that could damage the finish.
Next, address the non-stick plates. Gently wash them with warm, soapy water and a soft sponge. Never immerse the waffle maker body in water or any other liquid; this could cause electrical shock or damage the internal components.
Rinse the plates thoroughly and dry them completely with a soft towel. Ensure no water remains in any crevices. This initial preparation sets the stage for consistently perfect waffles and prolongs the life of your appliance. A clean start is a happy start!
Powering On & Indicator Lights
Connecting to power is simple: Plug your Cuisinart waffle maker into a grounded electrical outlet. You’ll notice the indicator lights illuminate, signaling the unit is receiving power. Typically, a “Power” light will glow steadily, indicating the appliance is on and ready.
A separate “Ready” light will initially illuminate, then turn off once the waffle maker reaches the optimal cooking temperature. Do not attempt to pour batter until the “Ready” light is off – this ensures proper waffle cooking and prevents sticking.
Some models may feature additional lights or audible signals. Refer to your specific model’s diagram for detailed light interpretations. Understanding these indicators is key to mastering your waffle-making experience!
Seasoning the Non-Stick Plates
Protecting your investment and ensuring effortless waffle release requires initial seasoning of the non-stick plates. After the initial cleaning, lightly brush both top and bottom plates with a neutral-flavored cooking oil – vegetable, canola, or even melted shortening work well.
Use a paper towel to spread the oil evenly, ensuring complete coverage, but avoiding excess pooling. Power on the waffle maker and allow it to heat up for approximately five minutes, letting the oil bake onto the plates.
This process creates a protective layer, enhancing the non-stick properties and preventing waffles from adhering. Repeat this seasoning process every few uses, or as needed, to maintain optimal performance.

Making Perfect Waffles: The Basics
Mastering waffle perfection begins with a quality batter and proper technique. This section details classic recipes, optimal batter amounts, and achieving desired browning levels.
Waffle Batter Recipes (Classic)
Embark on a delightful waffle journey with our classic batter recipe, designed for optimal results in your Cuisinart waffle maker. Begin with 1 ½ cups all-purpose flour, ensuring a light and fluffy texture. Incorporate 3 ½ teaspoons baking powder for that essential rise, and a pinch of salt to enhance the flavors.
Next, whisk together 1 tablespoon sugar, adding a touch of sweetness. In a separate bowl, combine 1 ¼ cups milk, 1 egg (lightly beaten), and 3 tablespoons melted butter. Gently fold the wet ingredients into the dry, mixing until just combined – avoid overmixing!
For a richer flavor, consider adding a teaspoon of vanilla extract. This recipe yields approximately 6-8 waffles, depending on your maker’s grid size. Experiment with variations like buttermilk for a tangier taste, or whole wheat flour for added nutrition. Enjoy!
Pouring the Batter – Correct Amount
Achieving perfectly filled waffles hinges on using the correct amount of batter. Overfilling leads to messy overflow, while underfilling results in thin, crispy waffles. A general guideline is to pour approximately ½ to ¾ cup of batter onto the preheated Cuisinart waffle maker’s lower grid.
However, this can vary based on your specific model and desired waffle thickness. Observe how the batter spreads; it should nearly, but not completely, cover the grid. Avoid exceeding the grid’s boundaries to prevent sticking and ensure easy removal.
Experimentation is key! Start with ½ cup and adjust slightly with subsequent waffles until you find the sweet spot for your machine. Remember, a consistent pour ensures consistently delicious results. Close the lid gently, allowing the waffle maker to work its magic.
Cooking Time & Browning Control
Optimal cooking time for your Cuisinart waffle maker typically ranges from 3 to 5 minutes, but this is heavily influenced by your desired level of browning and the specific model. Most Cuisinart waffle makers feature adjustable browning control settings, usually ranging from light to dark.
Begin with a medium setting and monitor the waffle’s progress. The indicator light will signal when cooking is complete, but visual cues are also important. Look for a golden-brown color and steam diminishing from the sides.
Experiment with settings to achieve your preferred crispness. Remember, higher settings yield darker, crispier waffles, while lower settings produce lighter, softer results. Avoid lifting the lid prematurely, as this can disrupt the cooking process.
Advanced Waffle Making Techniques
Elevate your waffle game! Discover the nuances of Belgian versus traditional waffles, achieving perfect thickness, even cooking, and delightful mix-in additions.
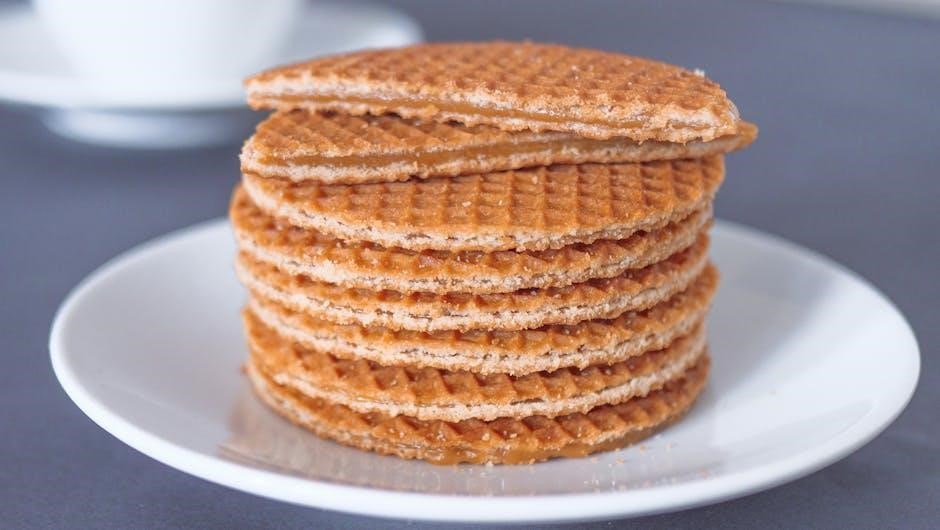
Belgian Waffle vs. Traditional Waffle
Distinguishing the Classics: Understanding the core differences between Belgian and traditional waffles is key to maximizing your Cuisinart waffle maker’s versatility. Traditional waffles, typically made with a thinner batter, yield a crispier, more delicate result, perfect for enjoying with a variety of toppings.
Belgian waffles, conversely, boast deeper pockets and a lighter, fluffier texture. This is achieved through a batter often incorporating beaten egg whites and a waffle iron with larger, more substantial grids. Your Cuisinart appliance, depending on the model (like the WAF-100), can handle both styles.
Experimenting with batter recipes and grid patterns allows you to tailor your waffle experience. Consider the desired texture and topping compatibility when choosing between these beloved breakfast staples. Mastering both unlocks a world of waffle possibilities!
Achieving Even Cooking & Thickness
Consistent Results: Ensuring your waffles cook evenly and achieve the perfect thickness requires attention to batter consistency and proper iron preparation. A well-seasoned, non-stick surface is paramount; lightly coat the plates before each use.
Pour batter evenly across the grid, avoiding overfilling, which can lead to overflow and uneven cooking. Utilize the browning control settings on your Cuisinart waffle maker to adjust heat based on your desired level of crispness.
Avoid lifting the lid prematurely, as this disrupts the cooking process. Allow the indicator light to signal completion. Consistent batter measurements and a gentle pour contribute to uniform thickness and a delightful waffle experience.
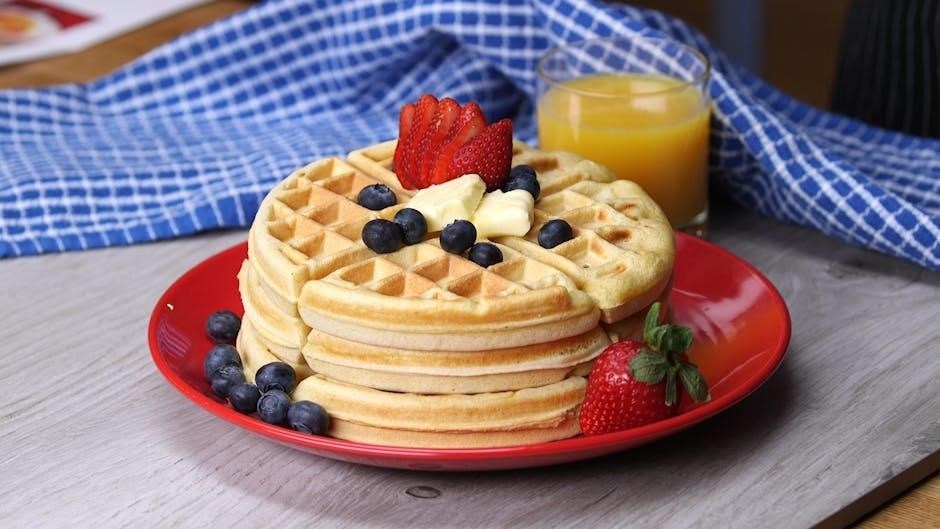
Adding Mix-Ins: Fruits, Chocolate Chips, etc.
Enhance Your Waffles: Elevate your waffle game with delightful mix-ins! Gently fold blueberries, sliced strawberries, or chocolate chips into your batter just before pouring. Avoid overmixing, which can toughen the waffles.
For larger pieces like banana slices or chopped nuts, lightly press them into the batter on the hot waffle iron immediately after pouring. This helps them adhere and cook evenly.
Be mindful of the amount; excessive mix-ins can prevent proper cooking and cause sticking. Experiment with spices like cinnamon or nutmeg for added flavor. A sprinkle of powdered sugar post-cooking completes the experience!

Cleaning & Maintenance
Keep it Pristine! Proper cleaning extends your waffle maker’s life. Always unplug and cool completely before cleaning the non-stick plates and exterior.
Cooling Down & Unplugging
Safety First! Before initiating any cleaning or maintenance procedures, it is absolutely crucial to ensure your Cuisinart waffle maker has completely cooled down. The heating plates reach extremely high temperatures during operation, posing a significant burn risk if handled prematurely.
Allow ample time – typically at least 30 minutes – for the unit to cool to the touch. Once cool, always disconnect the waffle maker from the power outlet. This prevents accidental activation during cleaning and safeguards against electrical shock.
Never immerse the appliance base in water or any other liquid. Disconnecting the power source is a fundamental safety step, protecting both you and the longevity of your waffle maker.
Cleaning the Non-Stick Plates
Gentle Cleaning is Key! Maintaining the non-stick coating is vital for optimal performance. After the waffle maker is completely cool and unplugged, gently wipe the plates with a soft cloth or paper towel. Avoid abrasive cleaners, scouring pads, or metal utensils, as these can damage the non-stick surface.
For stubborn residue, a slightly damp cloth with mild dish soap can be used. Ensure no water enters the appliance’s interior. Wipe thoroughly with a clean, damp cloth to remove any soap residue.
Avoid immersion! Never submerge the waffle plates in water. Proper cleaning preserves the non-stick properties, ensuring effortless waffle release and extending the life of your Cuisinart appliance.
Exterior Cleaning & Polishing
Maintaining a Pristine Finish! Regularly cleaning the exterior of your Cuisinart waffle maker keeps it looking its best. Always ensure the appliance is unplugged and completely cool before cleaning. Wipe down the exterior housing with a damp, soft cloth.
For fingerprints or light grime, a mild dish soap solution can be used, followed by a clean, damp cloth to rinse. Avoid harsh chemicals or abrasive cleaners, which could damage the finish.
Polishing for Shine! To restore shine, use a stainless steel polish specifically designed for kitchen appliances. Apply sparingly and buff gently with a soft, dry cloth. This will help maintain the sleek appearance of your Cuisinart waffle maker for years to come.

Troubleshooting Common Issues
Resolve Problems Easily! This section addresses sticking waffles, uneven browning, and indicator light malfunctions, ensuring optimal performance and delicious results.
Waffle Sticking to Plates
Addressing Sticky Situations: If your waffles persistently stick to the non-stick plates, several factors could be at play. First, ensure the plates are adequately seasoned; a light coating of cooking spray or oil before each use is crucial.
Secondly, verify you aren’t opening the lid prematurely. Allow the waffle to finish cooking – the indicator light will signal readiness. Avoid using excessive amounts of batter, as overflow can cause sticking.
If sticking continues, a thorough cleaning is necessary. Cool the waffle maker completely, then gently remove any residue with a soft cloth. Avoid abrasive cleaners, which can damage the non-stick coating. Re-seasoning after cleaning is highly recommended for continued success.
Uneven Browning Problems
Achieving Golden Perfection: Encountering uneven browning with your Cuisinart waffle maker? This often stems from inconsistent batter distribution. Ensure batter is poured evenly across the plates, reaching all corners.
Another cause could be variations in batter consistency; a well-mixed batter is essential. Check your waffle maker is on a level surface, as tilting can affect heat distribution. Avoid repeatedly opening the lid during cooking, as this releases heat and disrupts the process.
If the issue persists, try adjusting the browning control setting. Experiment with slightly higher or lower settings to find the sweet spot for your batter and desired crispness.
Indicator Light Malfunctions
Decoding the Signals: If your Cuisinart waffle maker’s indicator lights aren’t functioning as expected, first ensure the unit is properly plugged into a working outlet. A faulty outlet can mimic an appliance issue.
If the power light doesn’t illuminate, or the “ready” light doesn’t signal completion, allow the unit to cool completely, then try again. Persistent malfunctions suggest a potential internal problem.
Important: Do not attempt to disassemble or repair the waffle maker yourself. Contact Cuisinart customer support for assistance and potential warranty service. Ignoring a malfunctioning indicator light could pose a safety risk.

Safety Precautions & Warnings
Prioritize safety! Always follow electrical guidelines, avoid burns from hot surfaces, and store the waffle maker properly when not in use.
Electrical Safety Guidelines
Crucially, ensure your outlet voltage matches the waffle maker’s specifications to prevent damage or fire hazards. Never immerse the appliance, cord, or plug in water or other liquids. Always unplug the waffle maker from the outlet when not in use, before cleaning, and if any malfunction occurs.
Do not operate the appliance with a damaged cord or plug, or after it malfunctions. If the supply cord is damaged, it must be replaced by the manufacturer or a qualified technician. Avoid using extension cords; if necessary, use a heavy-duty extension cord appropriately rated for the appliance’s wattage. Inspect the cord regularly for any signs of damage. Never attempt to repair the waffle maker yourself.
Keep the appliance away from flammable materials.
Avoiding Burns & Hot Surfaces
Exercise extreme caution during and after waffle making, as surfaces become intensely hot. Always use oven mitts or heat-resistant gloves when handling the waffle maker, lid, and any hot components. Never touch the hot plates directly. Allow the waffle maker to cool completely before cleaning or storing.
Keep children and pets away from the appliance during operation and cooling. Be mindful of the steam released when opening the lid, as it can cause burns. Avoid placing the waffle maker near flammable materials. Do not leave the appliance unattended while in use. Ensure adequate ventilation to prevent heat buildup.
Supervise use if individuals are unfamiliar with the appliance.
Proper Storage Instructions
Before storing your Cuisinart waffle maker, ensure it is completely cool, clean, and dry. Disconnect the power cord from the outlet and allow ample cooling time to prevent accidental activation. Store the appliance in a cool, dry place, away from direct sunlight and moisture.
Avoid wrapping the power cord tightly around the appliance, as this can damage the wiring. Consider storing it loosely coiled or in a separate compartment. Keep the waffle maker in its original packaging, if available, for added protection. Do not stack heavy items on top of the appliance.
Regularly inspect the cord for damage before each use and storage.
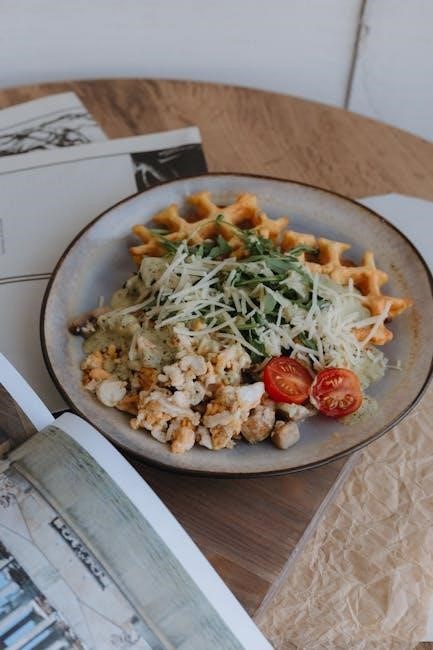
Recipes Beyond Waffles
Expand your culinary horizons! This versatile Cuisinart waffle maker excels at hash browns, paninis, grilled cheese, and even delightful cookie dough desserts.
Hash Browns & Potato Pancakes
Unlock a savory side with your Cuisinart waffle maker! Creating perfectly crisp hash browns and golden potato pancakes is surprisingly simple. Begin with shredded potatoes, squeezing out excess moisture for optimal texture.
Lightly coat the preheated waffle iron with cooking spray. For hash browns, form small patties and place them carefully onto the plates, avoiding overflow. For potato pancakes, pour a thin layer of batter, similar to waffle batter consistency.
Close the lid and cook for approximately 3-5 minutes, or until golden brown and crispy. Adjust cooking time based on your desired level of crispness. Serve immediately with your favorite toppings – sour cream, chives, or applesauce complement both beautifully!
Paninis & Grilled Cheese
Transform your Cuisinart waffle maker into a quick and easy panini press! This versatile appliance excels beyond waffles, delivering perfectly melted and toasted sandwiches. Lightly butter the exterior of your bread slices for a golden-brown finish.
Assemble your panini or grilled cheese with your favorite fillings – cheese, meats, vegetables, and spreads. Place the sandwich carefully onto the preheated waffle iron, ensuring it fits within the plate boundaries.
Close the lid gently, applying even pressure. Cook for 3-5 minutes, or until the cheese is melted and the bread is golden and crispy. Enjoy a restaurant-quality panini or grilled cheese in minutes!
Cookie Dough & Other Desserts
Expand your culinary creativity! Your Cuisinart waffle maker isn’t limited to breakfast; it’s fantastic for quick desserts. Pre-made cookie dough is a delightful treat – simply place a scoop onto the preheated, lightly oiled plates.
Close the lid and cook for 5-7 minutes, checking frequently to prevent burning. The result is a warm, gooey cookie with a slightly crispy exterior. Experiment with brownie batter or even cake batter for unique waffle-iron desserts!
Remember to adjust cooking times based on the batter’s consistency. Always monitor closely and use caution when handling hot desserts. Enjoy a sweet surprise!

Warranty Information & Support
Cuisinart provides comprehensive warranty details and dedicated customer support for your waffle maker. Find replacement parts easily online or via their service channels.
Cuisinart Warranty Details
Your Cuisinart waffle maker is covered by a limited warranty, protecting against manufacturing defects. Typically, this warranty spans a period of three years from the original purchase date, though specific terms can vary based on the model and region.
The warranty covers defects in materials and workmanship under normal household use. It does not cover damage resulting from misuse, accidents, or unauthorized repairs. Proof of purchase is essential for any warranty claim.
To initiate a claim, contact Cuisinart customer support with your model number and purchase details. They will guide you through the process, which may involve returning the appliance for inspection or repair. Retain your original packaging and receipt for a smoother claim experience.
Contacting Customer Support
Need assistance with your Cuisinart waffle maker? Cuisinart offers multiple channels for customer support. You can reach them via phone, typically available during standard business hours, for immediate assistance with troubleshooting or warranty inquiries.
Alternatively, explore the comprehensive support section on the official Cuisinart website. Here, you’ll find FAQs, downloadable manuals (like the WAF-100), and helpful articles addressing common issues.
Email support is also available, providing a convenient way to submit detailed questions or concerns. Be sure to include your model number and a clear description of the problem. Expect a response within a few business days. Their dedicated team is ready to help you enjoy perfect waffles!
Finding Replacement Parts
Maintaining your Cuisinart waffle maker is easy! Should any components require replacement, Cuisinart provides several avenues for sourcing genuine parts. The official Cuisinart website features a dedicated parts store, allowing you to directly order replacements based on your model number – often the WAF-100.
Alternatively, authorized Cuisinart service centers can assist with identifying and procuring the correct parts. Many online retailers specializing in appliance parts also carry Cuisinart components.
When ordering, always verify compatibility with your specific waffle maker model to ensure a proper fit and function. Replacing worn parts extends the life of your appliance and keeps those waffles coming!